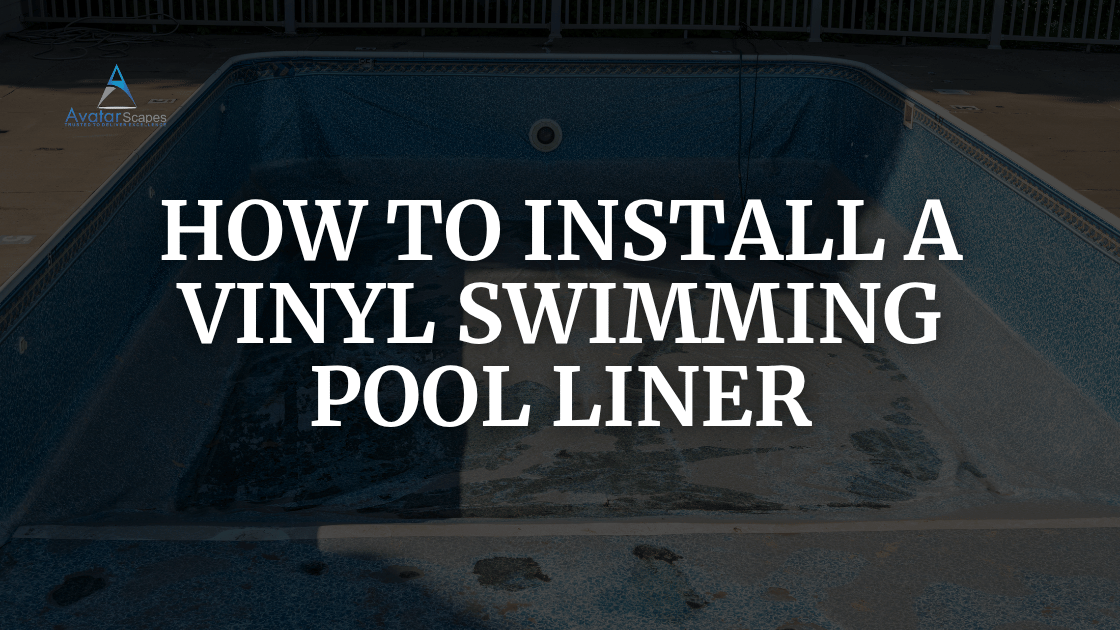
Installing a new vinyl pool liner might seem like a task best left to professionals, but with the right knowledge and preparation, you can tackle this project yourself. Whether you’re dealing with an aging liner or planning a complete refresh of your backyard oasis, understanding the installation process can save you thousands of dollars and give you immense satisfaction.
Understanding Vinyl Pool Liners
What Makes Vinyl Liners Popular
Vinyl liners have become the go-to choice for countless pool owners, and it’s not hard to see why. These flexible sheets create a watertight barrier between your pool structure and the water, offering a smooth, comfortable surface that’s gentle on feet. Unlike concrete or fiberglass pools, vinyl liner swimming pools provide an affordable entry point into pool ownership without sacrificing quality or aesthetics.
The beauty of a swimming pool vinyl liner lies in its versatility. You can choose from hundreds of patterns, colors, and textures that transform your pool from ordinary to extraordinary. Want the look of natural stone without the hefty price tag? Done. Prefer a classic blue that reminds you of tropical waters? You’ve got it.
Types of Vinyl Pool Liners Available
When you start shopping for vinyl liner swimming pool construction materials, you’ll encounter three main thickness options: 20 mil, 27 mil, and 30 mil. Think of these like choosing between regular, premium, and ultra-premium tires for your car. The thicker the liner, the more durable it becomes, but also the higher the cost.
Overlap liners are the most budget-friendly option, draping over the pool wall and held in place by coping strips. Beaded liners snap into a track for a cleaner look, while unibead liners offer flexibility by working with either installation method.
Signs You Need a Vinyl Liner Replacement
Visible Damage and Wear
Your pool liner talks to you, believe it or not. When you notice fading that makes your once-vibrant tropical paradise look like a washed-out photograph, that’s your liner saying it’s getting tired. Wrinkles that won’t smooth out, even after vacuuming, indicate the material has lost its elasticity.
Tears, punctures, and leaks are obvious red flags. Even small holes can lead to significant water loss and potential damage to your pool structure. If you’re constantly adding water or notice soggy ground around your pool, you’ve got a problem that needs addressing.
Age and Material Breakdown
Most vinyl liners have a lifespan of 7 to 12 years, depending on maintenance, climate, and usage. If your liner is pushing a decade, start planning for swimming pool vinyl liner replacement even if it looks okay. The material becomes brittle over time, losing its ability to stretch and conform to your pool’s shape.
Vinyl Liner Swimming Pool Construction Basics
How Liners Fit Into Pool Structure
Understanding vinyl liner swimming pool construction helps you appreciate what you’re working with. The liner sits between the pool walls and the water, held in place by either a track system or coping. Below the liner, you’ll find a layer of sand, foam, or vermiculite that protects the vinyl from sharp objects and provides cushioning.
Your pool walls, typically made of steel, aluminum, or polymer panels, create the framework. The liner must fit these walls perfectly, which is why accurate measurements are absolutely critical.
Measuring Your Pool Correctly
Grab your tape measure because precision matters here. Measure the length, width, and depth at multiple points. Pools settle and shift over time, so don’t assume your original specifications are still accurate. For custom-shaped pools, you might need to create a detailed diagram with measurements every few feet.
Professional tip: Always round up slightly when ordering. A liner that’s too large can be adjusted, but one that’s too small becomes an expensive mistake.
Calculating Swimming Pool Vinyl Liner Replacement Cost
Material Costs Breakdown
Let’s talk numbers. The swimming pool vinyl liner replacement cost varies widely based on several factors. A basic 20 mil liner for a standard rectangular pool might run you between $400 and $800. Premium 30 mil liners with designer patterns can push $1,500 to $2,500 or more.
Don’t forget the extras: new gaskets for fittings, pool floor padding if needed, and cleaning supplies. Budget an additional $200 to $500 for these supporting materials.
Labor vs. DIY Installation
Professional installation typically costs $1,000 to $2,500 in labor alone, depending on your location and pool size. That’s on top of the liner cost. By handling the installation yourself, you’re looking at potential savings of 50% or more on the total project.
However, be realistic about your skills and available time. This isn’t a weekend afternoon project. Plan for 2 to 3 full days of work, and have a backup plan if weather doesn’t cooperate.
Tools and Materials You’ll Need
Essential Equipment List
Before you start, gather these items: a shop vacuum or liner vacuum, utility knife with fresh blades, screwdrivers (both flathead and Phillips), adjustable wrenches, measuring tape, and a garden hose. You’ll also need the new liner, obviously, plus any replacement gaskets and faceplate screws.
A few beach balls or inflatable pillows help smooth out wrinkles during installation. Keep plenty of clean towels handy for drying surfaces and wiping away debris.
Safety Gear Requirements
Protect yourself with work gloves to prevent cuts from sharp edges. Knee pads save your joints during hours of kneeling work. Safety glasses guard against debris when cutting or drilling, and slip-resistant shoes prevent accidents around wet surfaces.
Preparing Your Pool for Liner Installation
Draining the Pool Safely
Never drain your pool without planning. Start by turning off all electrical equipment. Use a submersible pump to remove water, directing it away from your pool area to prevent flooding. Check local regulations because some areas restrict when and where you can drain pool water.
As the water level drops, watch for the old liner to separate from the walls. Once empty, remove the liner completely, checking underneath for any issues.
Inspecting and Repairing the Pool Base
This is your chance to address hidden problems. Examine the pool floor carefully, looking for rough spots, rocks, or root intrusions. Run your hands over every inch of the surface because even a small pebble can eventually puncture your new liner.
Fixing Common Base Issues
Found some divots or rough patches? Mix up some pool base mix or vermiculite to smooth things out. For serious problems like rust on steel walls or cracks in concrete bottoms, tackle these repairs now. Skipping this step is like putting new tires on a car with bent rims; you’re just asking for trouble.
Add a fresh layer of sand or foam padding if your existing base looks worn. This protective layer extends your liner’s life significantly.
Step-by-Step Vinyl Liner Installation Process
Step 1: Positioning the New Liner
Choose a warm, sunny day for installation if possible. The heat makes the vinyl more pliable and easier to work with. Unfold your new liner near the pool and identify the shallow and deep end markings.
Carefully carry the liner to the pool, working with at least one helper. Position it roughly in the center of the pool with the shallow end marking aligned correctly. Don’t stress about perfect positioning yet; you’ll adjust as you go.
Step 2: Securing the Liner in Place
For beaded liners, start snapping the bead into the track at the shallow end, working your way around the perimeter. Use a flathead screwdriver to guide stubborn sections into place. Overlap liners get draped over the wall and temporarily held with coping strips, but don’t lock them down tight yet.
Work methodically around the pool, securing small sections at a time. This prevents the liner from slipping out of position as you progress.
Step 3: Removing Wrinkles and Air Pockets
Here’s where patience pays off. Place your shop vacuum under the liner at one of the return jet openings, creating suction that pulls the liner tight against the walls and floor. Turn on the vacuum and watch the magic happen.
Walk around the pool, smoothing out wrinkles by hand as the vacuum works. Start from the center and push wrinkles toward the walls. Those beach balls come in handy here; place them strategically to hold the liner in position while you work other areas.
Don’t expect perfection immediately. Some wrinkles work themselves out as you fill the pool. Focus on eliminating major folds and ensuring the liner sits flush against all surfaces.
Step 4: Cutting Openings for Fittings
Once the liner is secure and relatively smooth, locate your return jets, skimmer opening, main drain, and any other fittings. Feel carefully to find the exact center of each fitting. Using your utility knife, make a small X-shaped cut, then gradually enlarge the opening to match the fitting size.
Install the faceplate and gasket for each fitting as you go, tightening screws in a star pattern to ensure even pressure. This creates a watertight seal and prevents the liner from pulling away.
Step 5: Filling the Pool
Start filling your pool with a garden hose, watching carefully during the first few inches. This is your last chance to make major adjustments to wrinkles. As water weight increases, repositioning becomes impossible.
Keep the vacuum running for the first several inches of water. Once you have about 6 inches covering the shallow end, you can turn it off and remove it. Continue filling, stopping periodically to smooth any developing wrinkles.
Fill the pool completely to its normal operating level. This typically takes 12 to 24 hours depending on your water pressure.
Common Mistakes to Avoid During Installation
Rushing the process is mistake number one. Give yourself plenty of time and don’t try to beat the weather forecast by cutting corners. Installing a liner when temperatures drop below 60°F makes the vinyl stiff and prone to tearing.
Another common error is leaving sharp objects or debris in the pool before installation. That five-minute inspection can save you from a swimming pool vinyl liner repair job just weeks after installation.
Don’t overtighten faceplate screws. You need a snug fit, not a Hulk-strength death grip that can crack the plastic or tear the liner. And please, please don’t let your dog or kids jump into the pool during installation. I know it’s tempting, but one misplaced paw or foot can spell disaster.
Swimming Pool Vinyl Liner Repair Techniques
Patching Small Tears and Holes
Accidents happen. Maybe a sharp toy slipped past your vigilance, or a winter storm sent a branch through your cover. Small tears don’t mean you need complete swimming pool vinyl liner replacement.
For underwater repairs, use a vinyl patch kit specifically designed for pools. Clean the area thoroughly, cut a patch that extends at least two inches beyond the tear in all directions, and apply underwater adhesive generously. Press firmly and hold for 30 seconds, smoothing out air bubbles.
For above-water repairs, you have more options. Drain the pool to below the damage level, clean and dry the area completely, then apply the patch with vinyl adhesive. Some people prefer heat-welding patches for a more permanent fix.
When to Call a Professional
Large tears, seam failures, or multiple repair spots signal that your liner has reached the end of its useful life. Patching a liner that resembles Swiss cheese is just throwing good money after bad. If you’re dealing with swimming pool vinyl liner stains that won’t respond to cleaning, or structural issues like pool wall rust showing through, professional assessment makes sense.
Dealing with Swimming Pool Vinyl Liner Stains
Identifying Different Types of Stains
Swimming pool vinyl liner stains come in various colors, each telling a different story. Brown or rust-colored stains usually indicate metal contamination, often iron or copper from well water or corroded equipment. Green or brown organic stains come from algae, leaves, or other plant matter. Purple or pink stains might be manganese.
Black spots often signal mold or mildew growing on the liner surface. Blue-green stains around fittings suggest copper corrosion in your plumbing.
Effective Cleaning Methods
For organic stains, try a vitamin C tablet directly on the spot. The ascorbic acid works wonders on metal stains too. Commercial stain removers designed for vinyl liners are available, but always test in an inconspicuous area first.
Never use abrasive scrubbers or harsh chemicals that can damage the vinyl. A soft brush, appropriate cleaner, and gentle circular motions usually do the trick. For stubborn stains, lower your pool’s chlorine level temporarily and apply a specialized stain treatment.
Prevention beats cure every time. Maintain proper water chemistry, brush your pool regularly, and address stains promptly before they set permanently into the vinyl.
Swimming Pool Vinyl Liner Paint Options
Can You Paint a Vinyl Liner?
This question pops up frequently, and the short answer is: not really. Swimming pool vinyl liner paint doesn’t exist in the traditional sense because paint doesn’t adhere well to the flexible, smooth vinyl surface. The constant water exposure, chemical treatment, and flexing would cause any paint to peel and flake quickly.
Some pool owners experiment with vinyl dye, but results are typically disappointing and short-lived. The dye can’t penetrate the vinyl’s protective coating, so it essentially sits on the surface waiting to wash away.
Alternative Solutions
If you’re tired of your liner’s appearance but it’s still structurally sound, consider these options instead of swimming pool vinyl liner paint. Vinyl overlays can give you a fresh look without full replacement, though they work better for above-ground pools.
Really, your best bet is saving up for a new liner. Modern liners come in stunning designs that were unavailable just a few years ago. From Mediterranean tile looks to Caribbean blue swirls, you’ll find something that transforms your pool’s appearance completely.
Maintenance Tips for Long-Lasting Liners
Want your new liner to last the full 10 to 12 years? Start with proper water chemistry. Keep pH between 7.2 and 7.8, alkalinity between 80 and 120 ppm, and calcium hardness between 200 and 400 ppm. These numbers aren’t just suggestions; they’re the difference between a liner that lasts and one that fails prematurely.
Brush your pool weekly, paying attention to areas where debris accumulates. This prevents staining and keeps algae from establishing a foothold. When vacuuming, use gentle pressure and avoid aggressive scrubbing that can wear down the vinyl.
Cover your pool during off-season. UV rays are vinyl’s worst enemy, causing fading and material breakdown. A good cover extends liner life by years.
Keep sharp objects, pets with claws, and rough pool toys away from your liner. Establish a “shoes off” policy and inspect toys regularly for sharp edges or damage. Train kids to be gentle with pool accessories and avoid throwing hard objects into the water.
Monitor water level carefully. A liner that dries out even partially can shrink and become brittle. If you need to drain your pool for maintenance, don’t leave it empty longer than necessary.
Vinyl Swimming Pool Liner Replacement in Roswell
If you’re looking for installation of a new vinyl swimming pool liner and replacement or repair in Roswell, Avatar Scapes is here to help. The hot Georgia summers put serious demands on pool liners, and Roswell homeowners know that a worn or damaged liner can turn your backyard retreat into a constant headache. Whether you’re dealing with stubborn leaks, unsightly stains that won’t budge, or a liner that’s simply reached the end of its lifespan, professional replacement services ensure your pool gets back to pristine condition quickly and correctly.
Avatar Scapes brings years of specialized experience to Vinyl Liner Replacement in Roswell. Their team understands the unique challenges that Georgia’s climate presents, from intense UV exposure during long summers to occasional winter freezes that can stress aging liners. They work with premium materials designed to withstand local conditions while offering the aesthetic appeal that matches your backyard vision. From the initial assessment and precise measurements to expert installation and final inspection, Avatar Scapes handles every detail with the professionalism and care your investment deserves.
Choosing local expertise for your swimming pool vinyl liner replacement makes all the difference. Avatar Scapes knows Roswell pools inside and out, understands local building requirements, and provides personalized service that national chains simply cannot match. They offer transparent pricing on swimming pool vinyl liner replacement cost, helping you understand exactly what you’re paying for without hidden fees or surprise charges. Whether you need a complete liner replacement, targeted swimming pool vinyl liner repair, or expert advice on maintaining your current liner, Avatar Scapes delivers solutions tailored to your specific needs and budget. Don’t let a failing liner keep you out of the water this season. Reach out to Avatar Scapes and discover why Roswell residents trust them to keep their pools looking beautiful and functioning flawlessly year after year.
Conclusion
Installing a vinyl swimming pool liner yourself is an achievable goal that puts thousands of dollars back in your pocket. By following this guide, preparing thoroughly, and taking your time through each step, you can achieve professional-quality results. Remember that proper preparation prevents problems, patience produces perfection, and maintenance extends your investment for years to come. Whether you’re tackling swimming pool vinyl liner replacement for the first time or you’re a seasoned DIYer looking to refine your technique, the satisfaction of completing this project successfully is immeasurable. Your pool is the centerpiece of summer fun, and now you have the knowledge to keep it looking beautiful and functioning perfectly.
FAQs
How long does it take to install a vinyl pool liner by yourself?
Plan for two to three full days to complete the installation properly. Day one involves draining the pool and preparing the base, day two focuses on positioning and securing the liner, and day three covers filling and final adjustments. Rushing through the process increases the likelihood of mistakes that could compromise your liner’s longevity.
What’s the average swimming pool vinyl liner replacement cost including materials?
Expect to spend between $600 and $3,000 for a complete DIY replacement, depending on your pool size, liner thickness, and pattern choice. This includes the liner itself, any necessary padding, gaskets, and supplies. Professional installation adds another $1,000 to $2,500 in labor costs, making DIY installation an attractive money-saving option.
Can I install a new liner over my existing pool floor padding?
In most cases, yes, but inspect the existing padding carefully first. If it’s compressed, moldy, torn, or has significant wear, replacement is worth the extra investment. Good padding protects your new liner from punctures and extends its lifespan, so don’t skimp on this crucial layer if it needs refreshing.
How do I prevent wrinkles when installing a vinyl pool liner?
Use a shop vacuum to create suction under the liner, pulling it tight against the pool walls and floor. Work on a warm day when the vinyl is more pliable, smooth wrinkles from the center toward the edges, and make adjustments during the first few inches of water filling. Some small wrinkles may resolve themselves as the water weight increases and the vinyl stretches into place.
Is swimming pool vinyl liner repair worth it, or should I just replace the liner?
Small tears, punctures, and isolated damage are definitely worth repairing, especially on newer liners. However, if your liner has multiple problem areas, is over 8 years old, shows significant fading, or has seam failures, replacement makes more financial sense. Think of repairs as temporary fixes for otherwise healthy liners, not life support for ones ready for retirement.

